
Designing is not always about letting loose and allowing creativity to take over at every step. You would still need a clear guide that would point out which direction you should go – thus, the wireframe.
What is a wireframe?
Think of it as a blueprint that an architect lays out to guide everybody involved in the project. It displays where everything goes, how big each of the elements should be, and how everything will be connected.
A wireframe goes beyond the surface, and can actually be used to lay out how visitors can interact with each page. Dropdown menus, for example, can be part of the layout. It can help you visualize how each menu would react with every click or hover.
Just think about your wireframe as the most basic foundation of the pages you will be working on. Without a strong wireframe, it’s easy enough for the entire thing to crumble down to pieces. Ensure its strength, and you’ll have a strong enough website that can go beyond what you expect it can do.
Efficient Wireframing Tools for Designers
As with any other technical process, wireframing requires a few tools for the job to be executed for seamlessly. These five tools have proven to be more efficient than all the others, helping designers create the framework that they would eventually turn into the kinds of websites that dreams are made of.
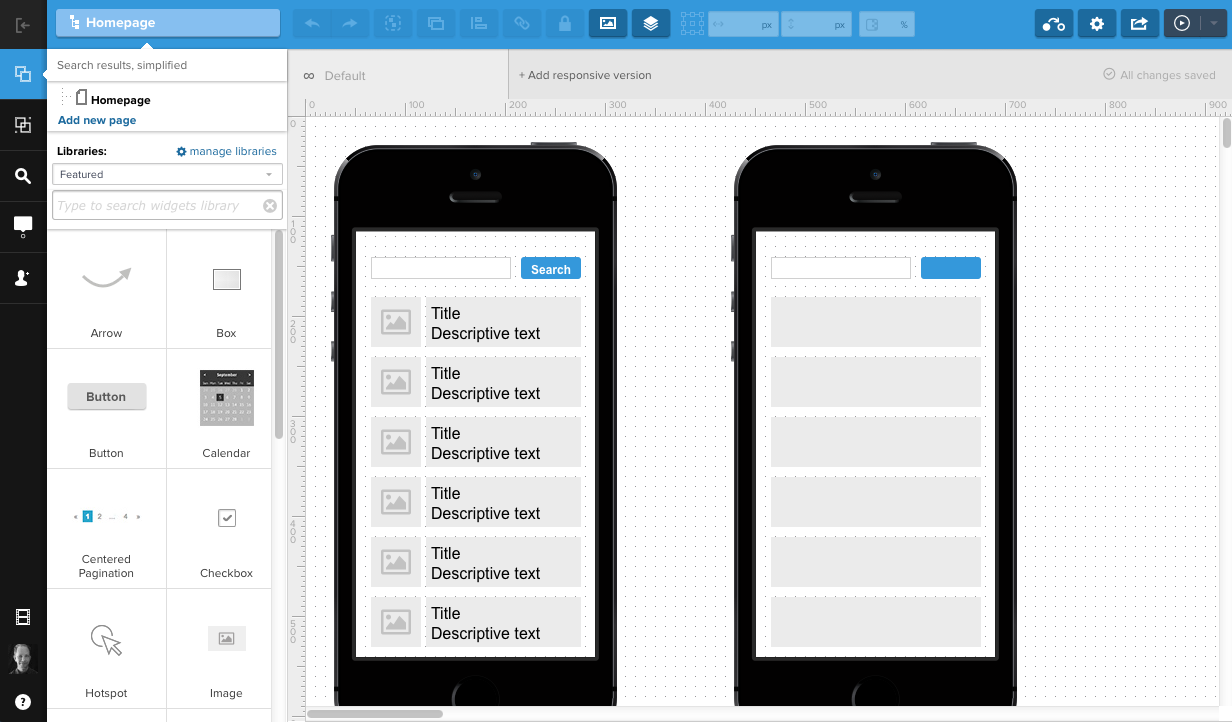
1. Mockplus

Mockplus has become a favorite among designers because of its code-free system. Everyone knows that if there’s one thing that designers hate, it’s coding. And that’s one thing that Mockplus eliminates with its drag and drop system.
The system also allows a lot of flexibility for designers who still rely on the power of their hands to design anything. It allows hand-drawn components to be included into your foundation, and also has markup components, over 400 icons, and around 200 pre-made components.
The ease of use is also apparent when you look at the speed by which you can complete a decent wireframe of the project. If it takes you quite some time on other systems, Mockplus allows you to create a prototype of your project, a great one at that, in just 5 minutes! You can check out your wireframe from your mobile device through QR code, too.
The team recently released version 2.1 of Mockuplus, which means you can simply drag-and-drop to build interactive prototypes effortlessly. A set of pre-designed components, including pop-up panel, stack panel, scroll box, sliding drawer and image carousel, allow you to create interactions faster and easier.
Curious about other things that you can do with Mockplus? A tutorial section is available, extensive enough to help you master the ins and the outs of the system. And guess what? This is just the beginning of the list. Mockplus comes with so many features that make life so much easier for designers.
Overall, Mockplus has yet to show its disappointing side, if there is one.
2. UXPin
Yet another great pick in the wireframe market, UXPin has also become a go-to tool for those hoping to create effective wireframes the most efficient way possible. What stands out about UXPin is its ease of use. The interface is so easy to interact with, and documents and images you’ll be using can be easily incorporated into the design you’re creating.
The preview mode is also seamless, allowing you to see not just how your mockup looks like to an outsider, but also how each page will work as they click or hover on different parts. People collaborating on the project will also be able to add their comments instantly, making it easier for people to work together on a single project.
As far as this comment feature is concerned however, it would have been better if UXPin were to find a way to notify each user in case a new comment has been added to their work. Because there is no such thing in place yet, you would have to check time and time again if new comments have been added.
3. Proto.io

Unlike a lot of other prototyping tools, proto.io is actually web-based, so you would need to be connected in case you want to use the system. If you’re always online however, then it wouldn’t be a problem at all and you can fully enjoy the great features that proto.io has.
The built-in widget libraries could be one of the most important features that proto.io has, as everyone knows what a hassle it could sometimes be to have to hunt for what you need through third-party libraries. Of course, in the event that they do not have what you’re looking for, then it’s also easy enough to integrate other sources. It also allows you to work on unique screen sizes should you find yourself working on wearables and other similar tech.
If you find yourself working on common layouts, proto.io has starter projects you can use to make the whole job easier. You can also store different variables that allow you to see what happens to each page when users interact with it.
Knowing that the system is web-based however, means that there are also a few limitations that come with it. For example, proto.io does not back up saved versions at a screen or page level, and only does so for the entire project. There is also no way at all to add requirement documents.
Despite its limitations, proto.io is a great tool to use especially if you’re on the go and find yourself in a position where you do not have access to the usual tools you use. Because it’s web-based, it’s something you can pretty much access from anywhere.
4. MockFlow

MockFlow makes it easier to create wireframes because of its clean and simple interface. It gets rid of all the clutter – all you have left is a clean space to work with, with a standard menu on top and a toolbar that you can hide in case you need more space. You have every possible pre-designed component you might need as you work as well.
MockFlow also allows you to make your first mockup for free, which gives you the chance to get a feel of how the entire thing works before taking the actual plunge. As for the workflow and functionality, this is hands down impressive. The drag-and-drop and double-click interface makes it easier to add components without having to code, and each component can also be adjusted from there. The export process is also a breeze, in case there are pages that yu would have to export from somewhere else.
Collaboration-wise, MockFlow allows you to let people into the project in case you need them to view the mockup and weigh in on how it’s going so far. A chat feature is available, allowing everyone to share their thoughts about the project real-time. The only problem here is the fact that although there is an option for every collaborator to refresh the page from their end in case anyone in the team makes changes, it can become very confusing in case people start making changes and the others are unable to refresh their screens on time. Clear communication is definitely needed to make it work this way.
5. InVision
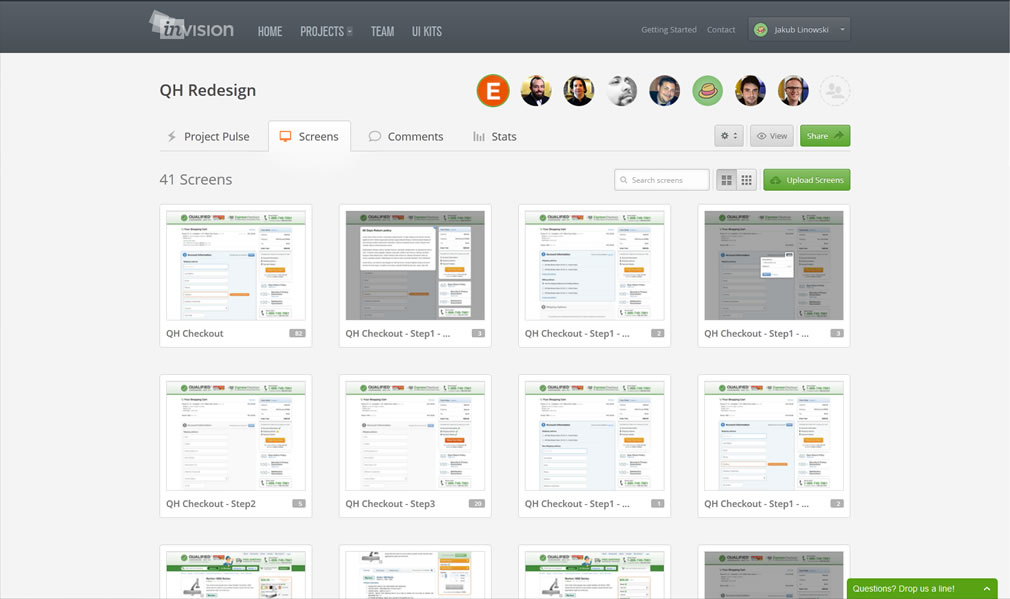
If there’s one thing that makes InVision stand out from all the rest, it’s the fact that InVision offers a free-for-life plan that allows you to do one project. This is perfect for students and beginners who just want to try their hand on the system and see what they can actually do with it without having to worry about their budget (which beginners usually do not have). As for the paid plans, InVision has proven to be one of the cheapest in the market, with low monthly subscriptions for the different packages they offer.
Sharing and collaboration is also easy with InVision. You can have team members and clients adding comments directly to your designs, and you can easily keep track of different conversations as they are organized by thread.
InVision also allows you to experience what your wireframe would look like as it gives you interactive prototypes. Support also runs across different platforms, from mobile to desktop, even extending to wearables.
Another great InVision feature is the project status panel. You can easily update the entire team about your progress through this function. Each part of the workflow can also be easily marked as “in progress” or “needs review”, and you can even mark some parts as a “backlog” or as “approved”.
You also have excellent version control as you have access to previous versions of your design. It also allows integration with other programs you use, like Dropbox, Photoshop, Sketch, and a lot more.
These five tools prove that wireframing should not be a struggle. Although each of them have their share of pros and cons, they have proven to be the most efficient among all the available prototyping tools in the market today.
Making Wireframing Even More Efficient
Although there are so many tools that you can use to create your wireframes, a lot of the work will also come from you. Because of this, here are a few tips you need to keep in mind to make your wireframing even better.
Look for inspiration.
You can drag and drop so many elements into your mockup, but without the right kind of inspiration, there’s nothing much that you can do. Always check around for inspiration and find similar projects that other designers may have worked on so that you can find out what you like (and do not like) about each of them. With a clearer sense of what you want to eliminate from your mockup, it’s a lot easier to design a clean wireframe that only has what you need.
Create your own process.
Different designers work differently, and a process that works for one designer may not work for everyone. Try to figure out what process works for you best so that you can maximize your time and effort. One person may find it easier to work on a sketch, then move onto the wireframe, then the visual, but for you, it could be a more efficient process if you create a sketch first and then go straight to coding. It’s all up to you.
Always pick your own tools.
Just because all the other designers you know are using the same tool does not mean that you would have to do the same thing. While their wireframing tool may be working for them, it’s possible that it wouldn’t work for you as your processes also differ from theirs. Always find out more about the different tools in the market and check out what fits your personality and style the most. So what if nobody else uses it? The point is, you are most efficient at it.
Always have a hierarchy outline.
Each page has a point of focus that you want people to see, and without a proper outline that tells you which elements should stand out from all the rest, it would be harder to create a design that follows your goals. If you have a clear outline of which areas should stand out, it would also be easier to decide whether this specific text should be bolder, while a few group of words should be set back a little bit farther.
Start with grayscale.
Color is important, but it’s also tricky to work with. You may want to start out with a grayscale layout, then add images that you will be using, then add the colors in later on. If you start with colors right away, there’s a huge chance that the entire page would look like a circus even before you complete all the needed elements.
Wireframing is not always easy, but the process gets better and better each time. Constant practice should do it, and with the right tools in hand, you can create breathtaking wireframes that clients will love.